Workbench Tour
After signing in you land on the framing workbench. The screen has four areas: top bar, asset library (left), stage (center), parameter panel (right). Panels are resizable and collapse into icon docks.
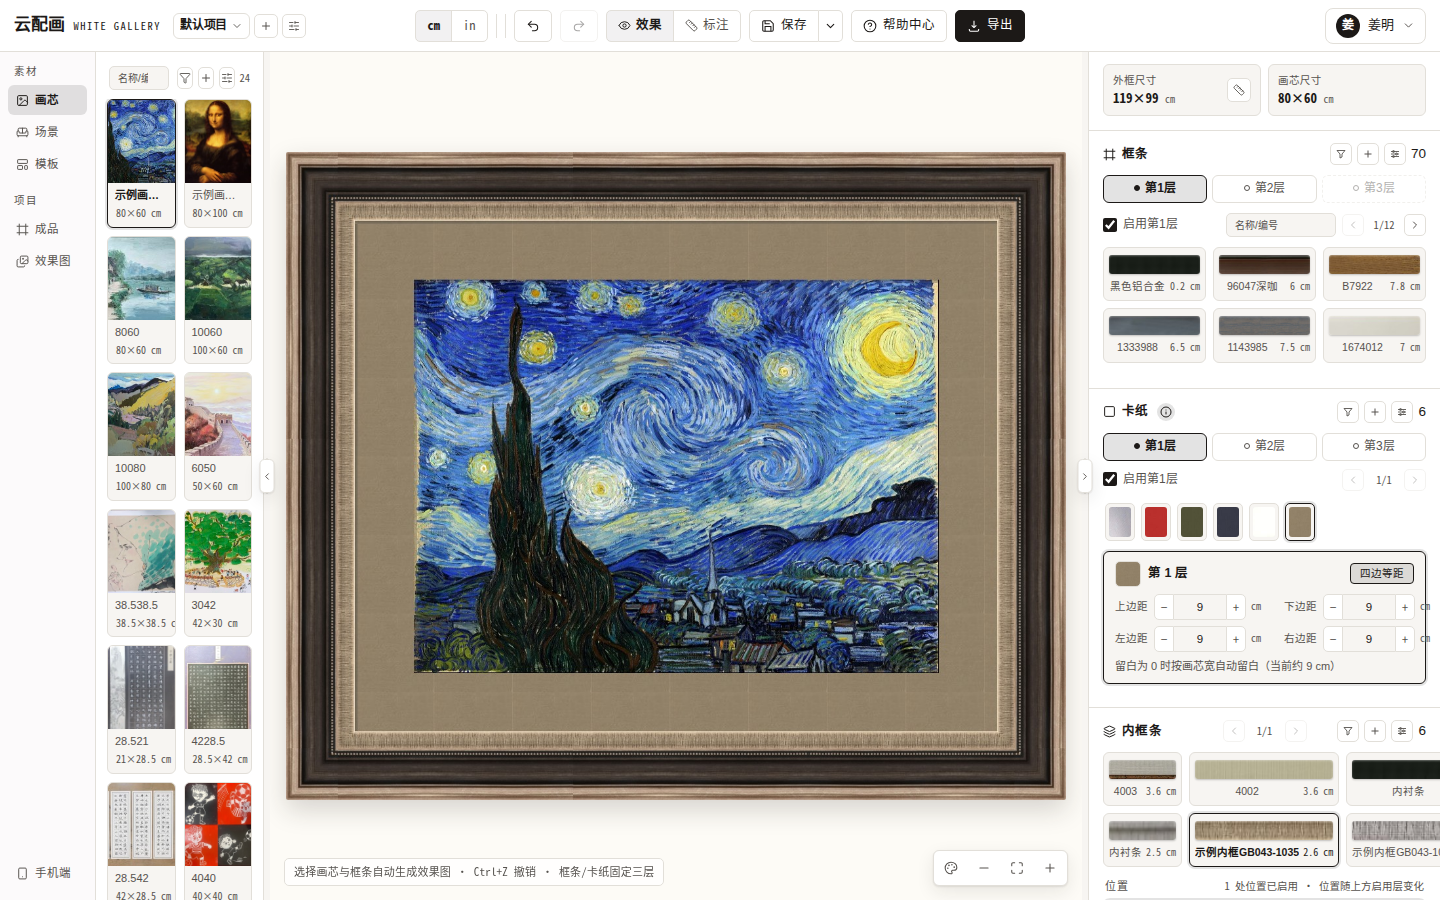
Top bar
| Area | Content |
|---|---|
| Left | Brand name, project bar (switch / create / manage projects) |
| Middle | Unit switch (cm / in), undo / redo (Ctrl+Z, Ctrl+Shift+Z), Effect / Dimension mode toggle |
| Right | Save (split button: artwork / template / scene render), Export, language, user menu |
Asset library (left)
Five tabs in two groups:
- Assets: pictures, scenes, templates;
- Projects: artworks, scene renders.
Every tab supports name/number search, infinite scroll, filtering, creating and managing — see Asset Library.
Stage (center)
Real-time rendering: scroll to zoom, drag to pan; selecting a scene enables wall mode; switch between Effect and Dimension modes — see Preview Stage.
Parameter panel (right)
From top to bottom: size summary, frames (3 layers), mats (3 layers), fillets, work order, quote. Every change instantly updates the stage and the price — see Framing Parameters and Quote & Work Order.
Good to know
- Units can be switched between cm and in at any time; storage is always cm (1 in = 2.54 cm);
- Prices and renders update in real time with every change;
- URLs accept
?pictureId=to open a picture directly and?artId=to re-design an artwork; - New accounts come with a set of “example” assets to try framing immediately.
Non-member accounts are locked behind an “Activate membership” overlay; it unlocks right after purchase.