Framing Parameters
The right panel is the framing control console: size summary → frames → mats → fillets → work order → quote.
Size summary & outer-size calculator
The header shows outer size and picture size. The ruler button opens the “Outer size breakdown” dialog:
- A nested diagram of outer frame → frames → mats → picture;
- Both formulas: derive the visible picture area from a chosen size, or derive the outer size from the picture + mat margins + fillets×2 + frames×2.
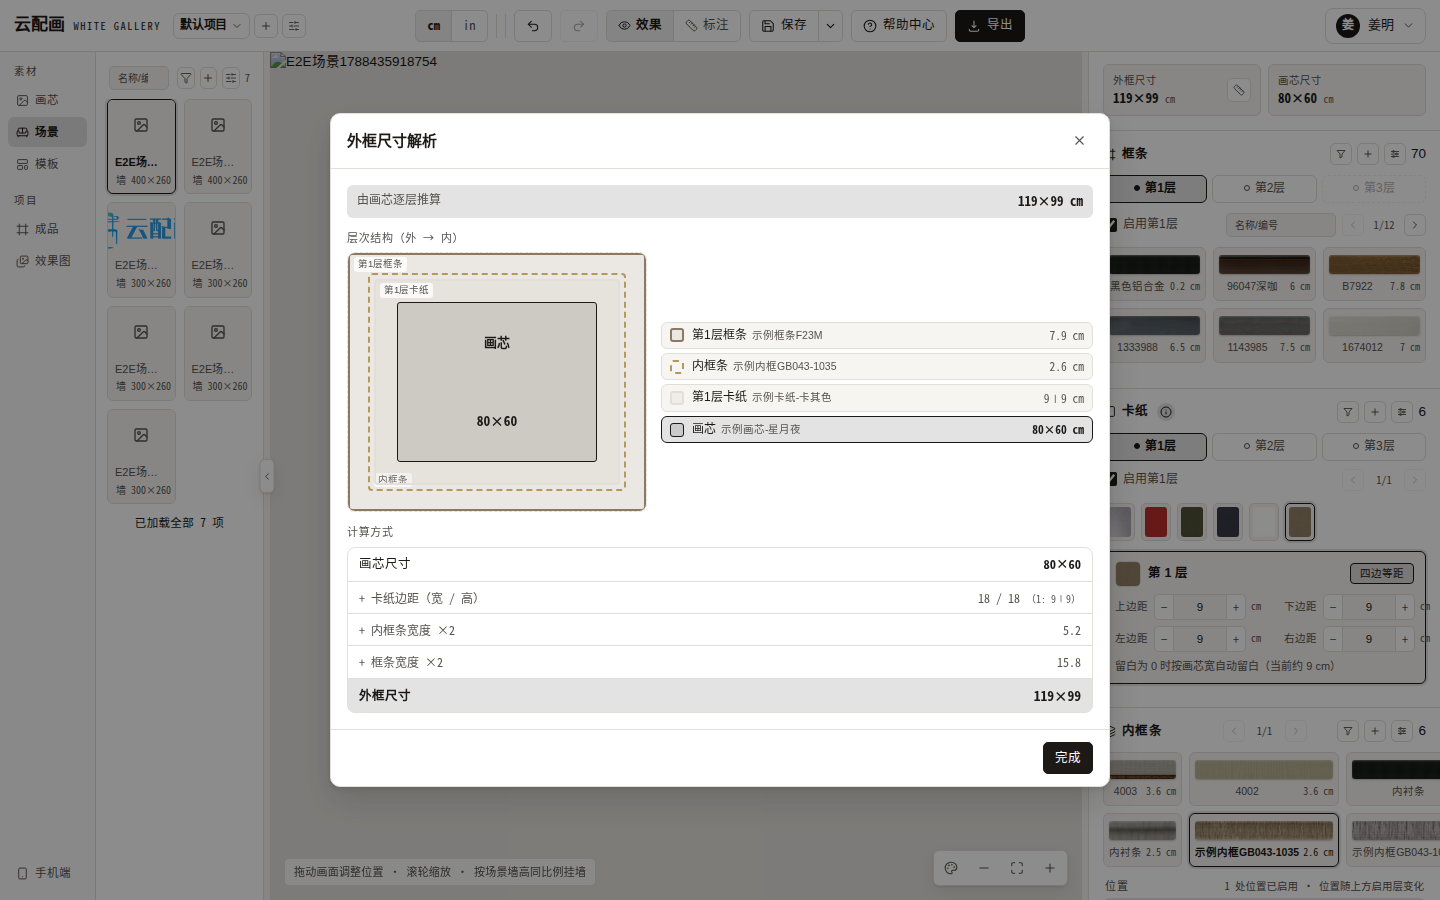
Without a chosen artwork size, the outer size grows outward: picture + Σ(frame width×2) + mats + Σ(fillet widths×2); with a chosen size the visible picture area is derived backwards.
Frames (fixed 3 layers)
- Layers run outside → inside: layer 1 → 2 → 3;
- Order dependency: layer N requires the previous layer to be enabled;
- Each layer can be unchecked; unchecking layer 1 clears mats and fillets (no auto-restore);
- The list has search and paging; hovering a thumbnail shows details (number / width / corner width / price).
Frame width, corner width (for rounded frames, must be ≤ width) and inner slot are curated by the platform; file a ticket to request new styles.
Mats (fixed 3 layers)
- Mats depend on frames: locked until at least one frame layer is enabled;
- Each layer has top / bottom / left / right margins (stepper inputs, max 200cm / 80in) plus an “equal margins” shortcut;
- With all margins 0, a default margin (~12% of the picture width) applies.
Fillets
- Pick a fillet and choose a position: inside frame layer 1..N or inside mat layer 1..N (options follow enabled layers);
- Each position can be enabled independently.
Tips
- Select the picture before enabling frames so the default mat margin is computed from its width;
- Comparing frames? Pick A, screenshot, switch to B — price and render refresh instantly;
- The unit switch only changes the display, never stored artwork data.