Asset Library
The left library has five tabs in two groups: Assets (Picture / Scene / Template) and Projects (Artwork / Render).
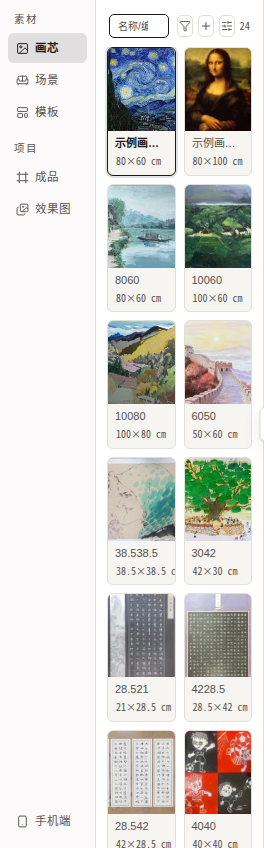
Common actions
Each tab header has a small action group:
| Button | Purpose |
|---|---|
| 🔍 Search | Server-side fuzzy search by name / number |
| Filter | Opens the filter dialog, see below |
| + Add | Upload a new asset, see below |
| Manage | Opens the management table (includes disabled assets via “Show all”) |
Lists load more as you scroll; the footer shows “All N items loaded”.
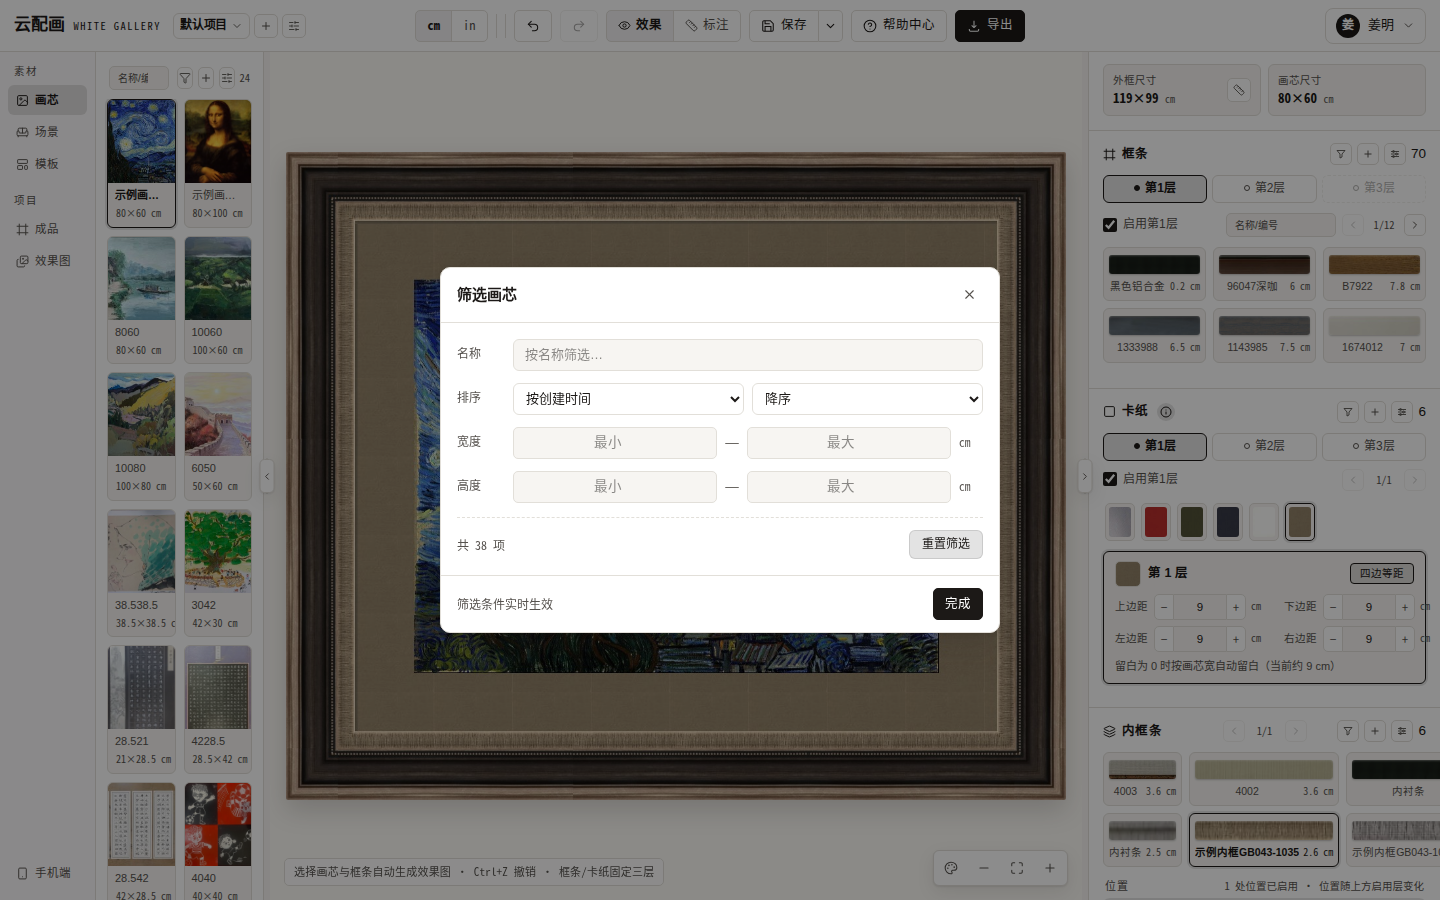
Filter dialog
- Sort: by name / width / height / price / creation time, ascending or descending (default: newest first);
- Width/height range: client-side size filter (cm/in aware);
- Scene tab adds space / style / tag dropdowns;
- “Reset filters” clears everything; conditions apply instantly.
Add / edit assets
The ”+ Add” form uploads images through the platform upload endpoint (images only, ≤ 10MB each). Fields per type:
| Type | Fields |
|---|---|
| Picture | Name*, number*, width(cm), height(cm), sale price (image required) |
| Frame | Name*, number*, width(cm)*, corner width(cm), inner slot(cm)*, sale price (corner width ≤ width) |
| Mat | Name*, number*, sale price (image required) |
| Fillet | Name*, number*, width(cm), sale price |
| Scene | Name*, image (optional), details, space/style/wall size |
* = required; all types accept an optional 255-char description.
Frame image optimization
Frame and fillet forms include an “Optimize” button that turns a real photo into a tileable rendering asset — see Frame Image Optimization.
Tab cheat sheet
| Clicking… | Does… |
|---|---|
| Picture card | Selects it for framing |
| Scene card | Enters wall mode (click again to cancel) |
| Template card | Restores its framing parameters onto the current design |
| Artwork card | Re-opens it via ?artId= |
| Render card | Restores its scene + framing parameters |
Hovering a card reveals badges: zoom, edit, delete; artworks and renders also get “copy / move to project”.
Creating scenes
Use ”+” in the scene tab: name (required), scene image (fallback: plain wall color), space (single), styles (multi), wall width/height (cm) for proportional mounting.
Management table
The “Manage” dialog defaults to enabled assets; “Show all” includes disabled ones — disabled assets are hidden from the library but can be re-enabled here.