Your First Framing
Follow these 6 steps to finish your first framing with the starter assets — about 3 minutes total.
1. Pick a picture
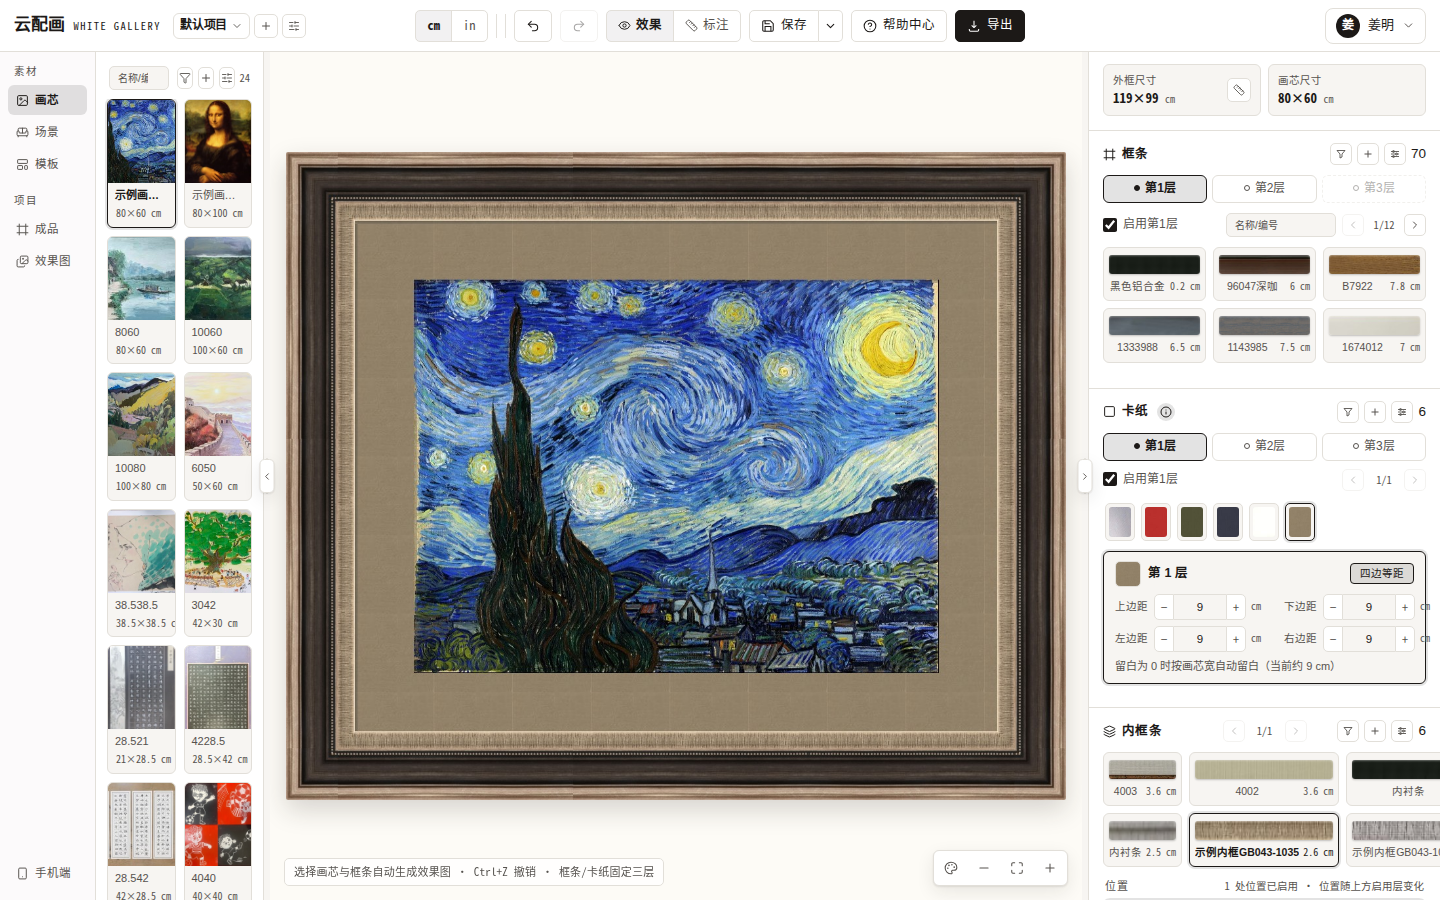
In the left asset library make sure the Picture tab is active (default), then click the “Starry Night” example card. The stage shows it immediately.
2. Enable the first frame layer
In the right parameter panel, Frame section:
- Tick “Enable layer 1”;
- Click a frame in the list (e.g. example frame F23M).
The stage updates in real time. Up to 3 frame layers can be stacked, in order.
3. Add a mat
In the Mat section tick “Enable layer 1” and click a mat swatch (e.g. khaki). A default margin (~12% of the picture width) is applied; all four margins can be adjusted.
4. (Optional) add a fillet
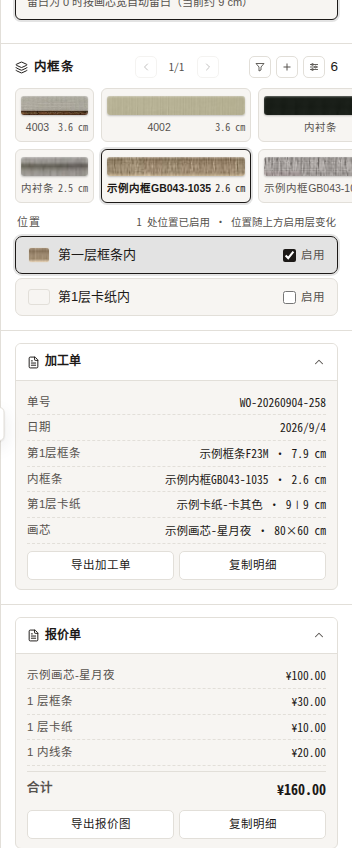
In the Fillet section enable one and pick a fillet — it renders as a thin line between frame and mat.
5. Check the quote
Expand the Quote section at the bottom of the panel: every line item (picture, size, frames, mats, fillets) plus the total. Use “Export quote image” or “Copy details”.
6. Save the artwork
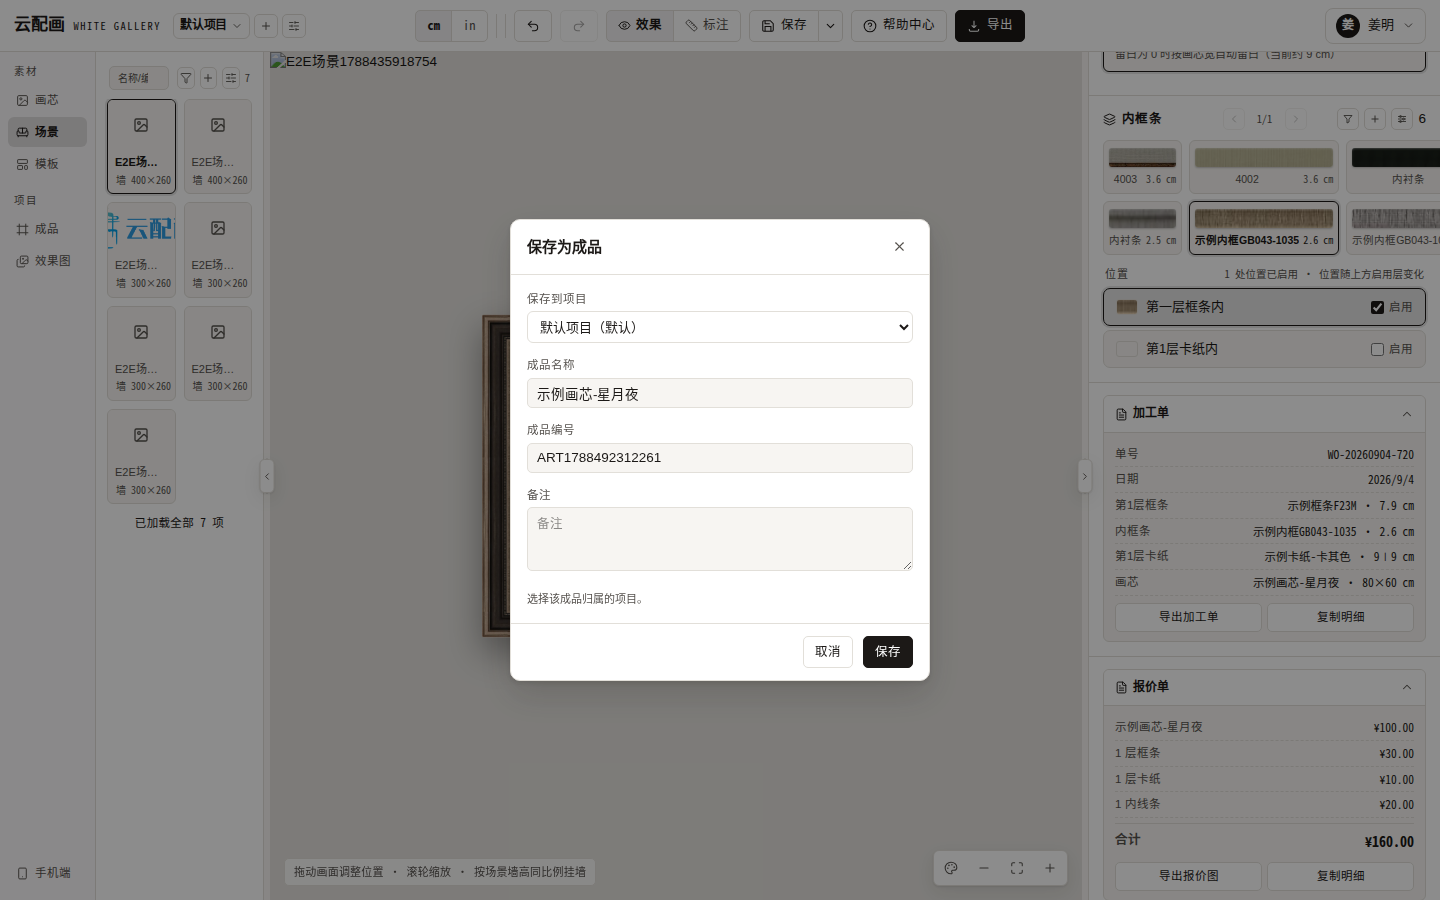
Click Save in the top bar, fill in the artwork name (number is auto-generated), choose a project and confirm. Reload it anytime from the “Artwork” tab of the library.
Congrats — you know the core loop now. Continue with:
- Asset Library: upload your own pictures, manage assets;
- Framing Parameters: multi-layer frames, mat margins, size derivation;
- Preview Stage: wall mode, background color, dimension mode, HD export.